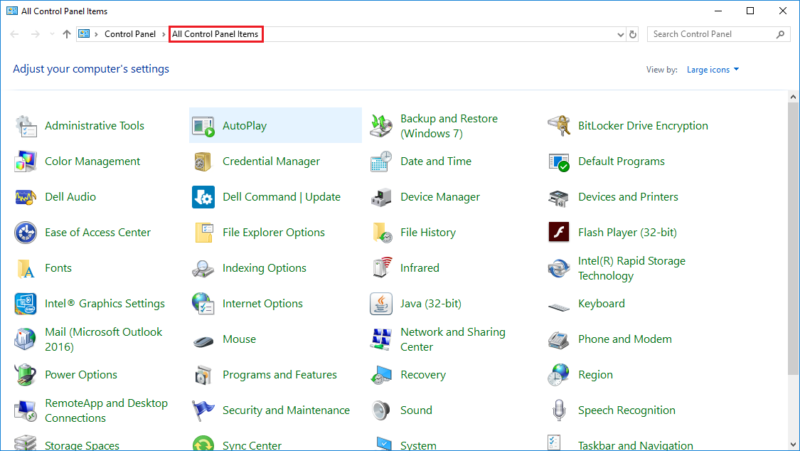
1. Open the "Control Panel" by searching for it in the search bar next to the Start Button.
2. Ensure that "All Control Panel Items" is your active view at the top of the window.
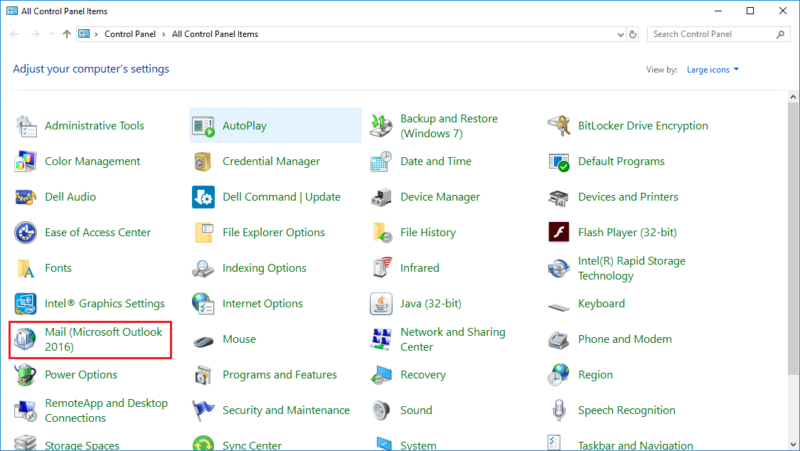
3. Click on the "Mail (Microsoft Outlook...)" icon.
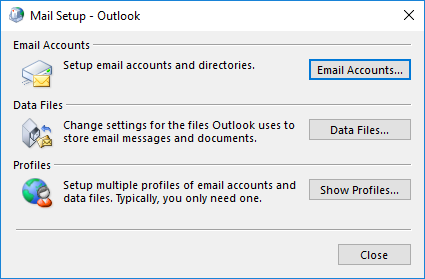
4. In the "Mail Setup - Outlook" dialog box, click "Email Accounts...".
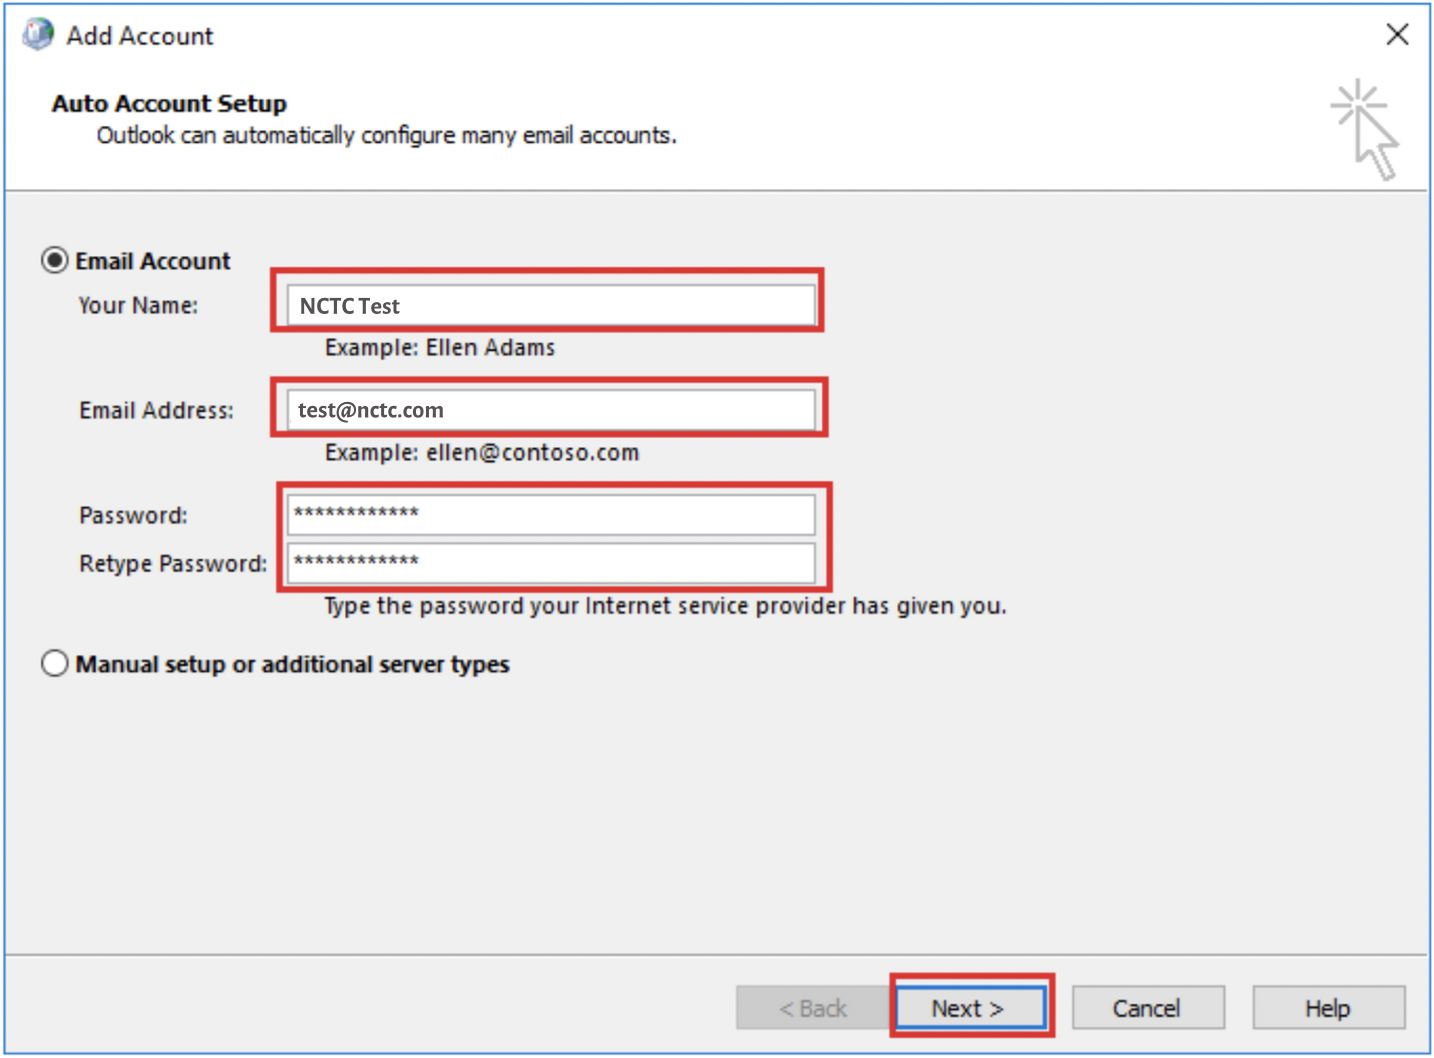
5. On the Add Account window that shows up afterwards, fill out the
fields:
- Your Name:
- Email Address:
- Passwords:
- Retype Password:
Then click on the "Next" button.
NOTE: If the auto-configuration process doesn't work, see the section below for manual configuration instructions.
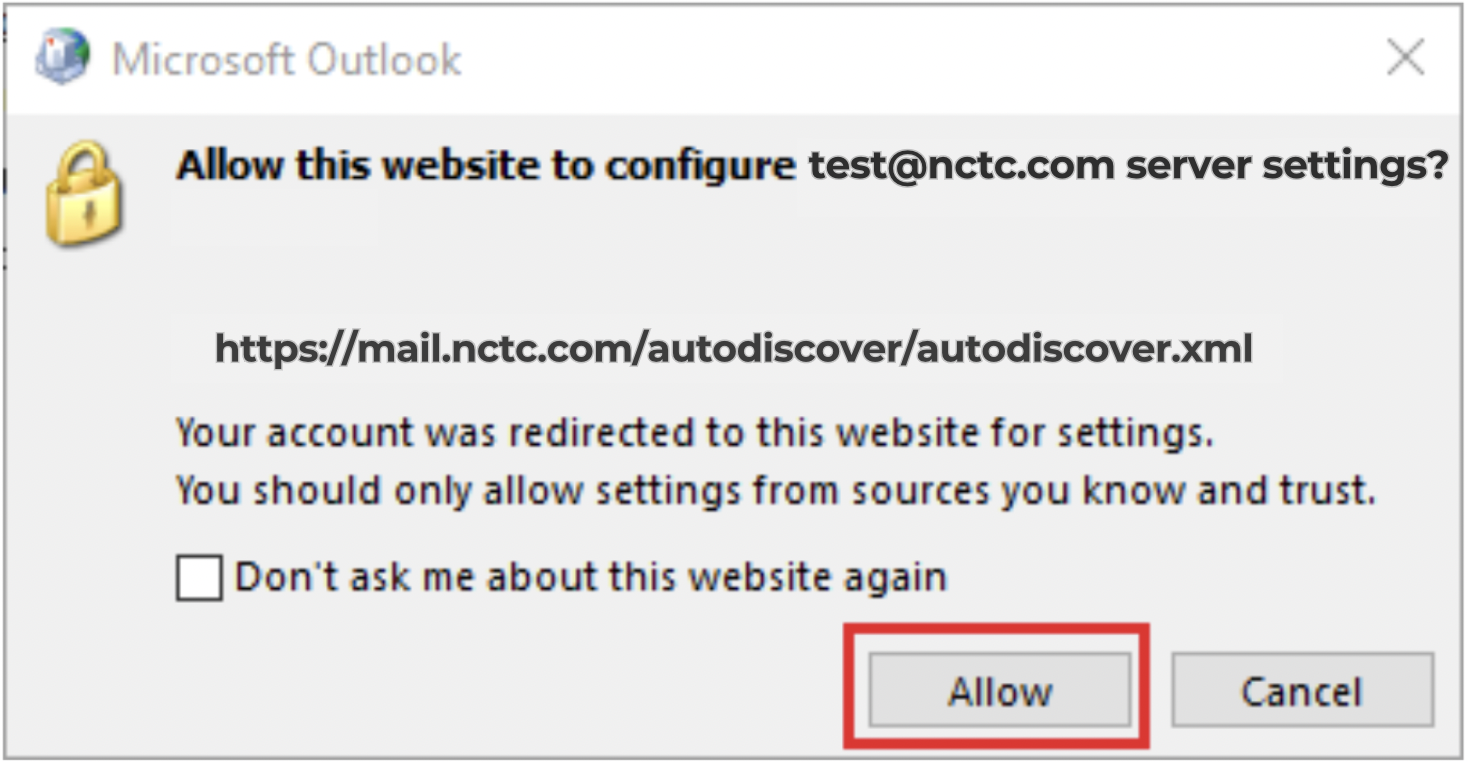
6. A dialog box asking to configure server settings may appear, if so, click "Allow".
7. A dialog box should appear next checking off the configuration process. After the configuration is done, it should say the email is successfully
configured. Click "Finish"
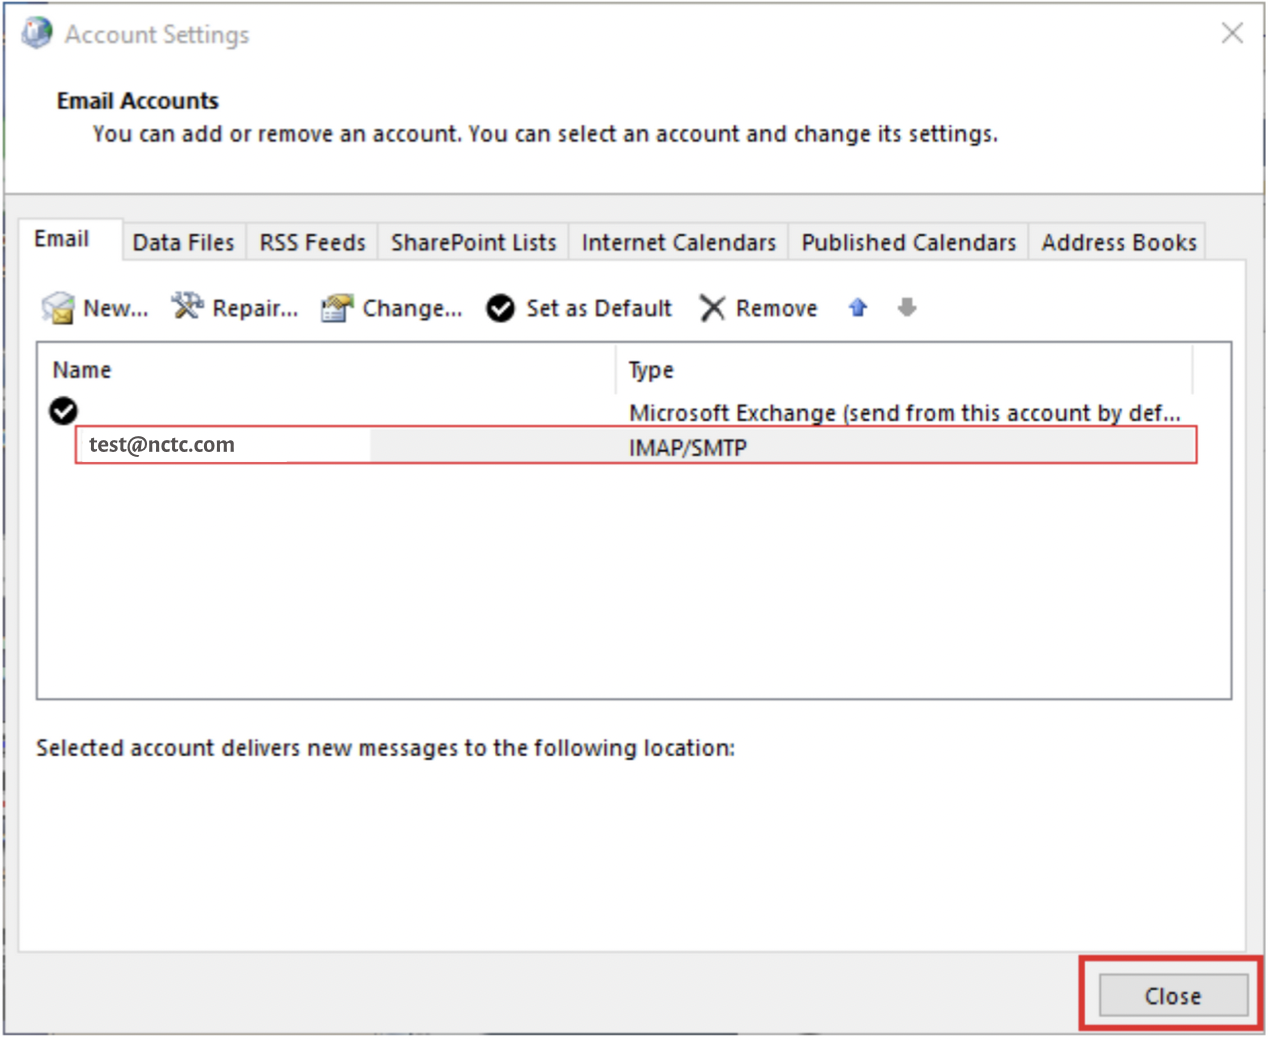
8. You should be met with the Account Settings dialog box and the new email address should be on the list. Click "Close".
9. Open Outlook as normal to view your mail.
Manual Email Configuration
If the auto-configuration doesn't work, you can choose to do a manual account setup. To do so, follow the steps below:
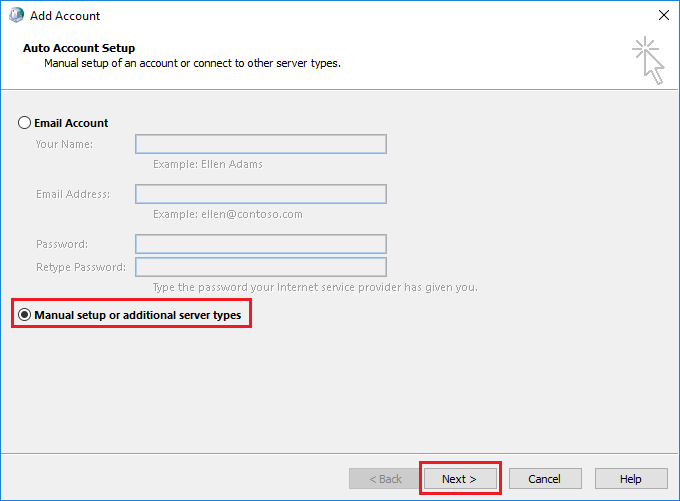
1. At the “Add Account” dialog box, select the option “Manual setup or additional server types” and click “Next”.
2. For the account type, click the "POP or IMAP" radio button and click "Next".
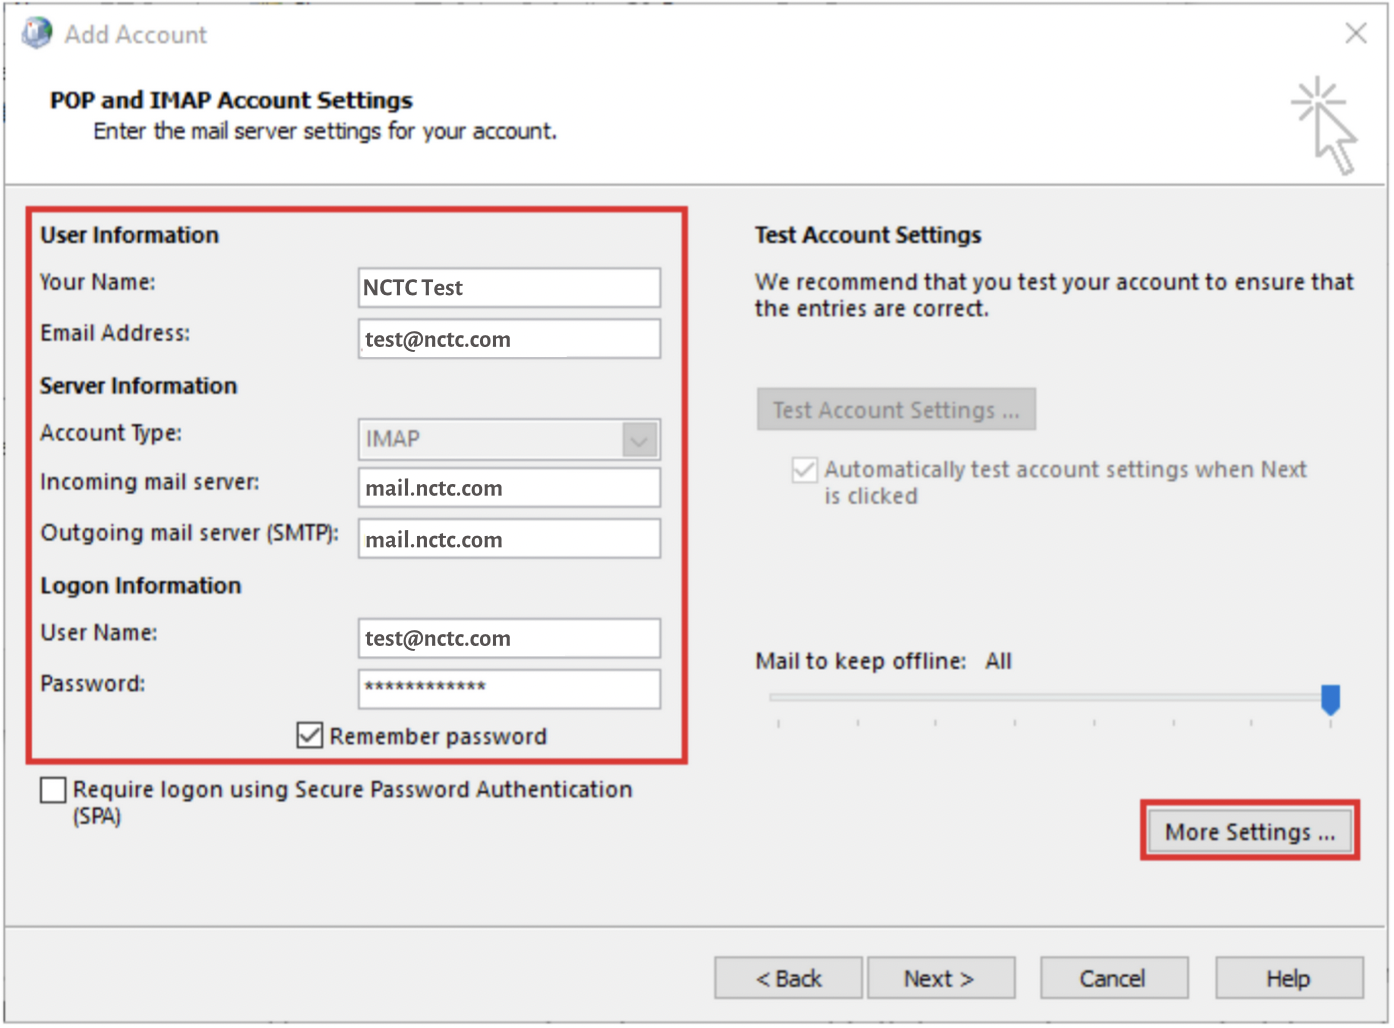
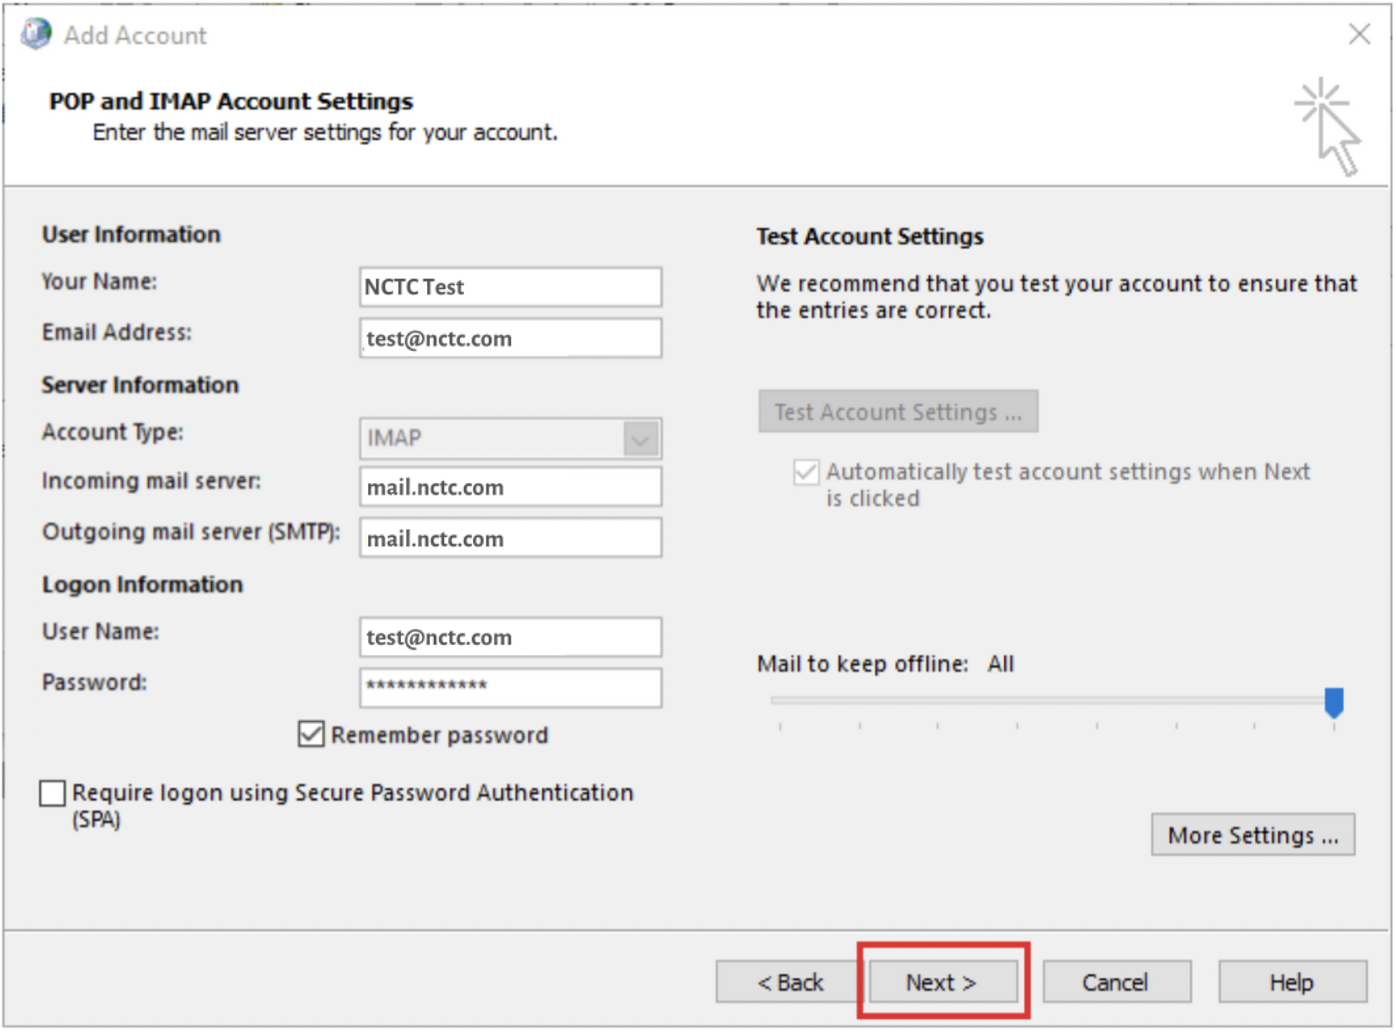
3. Input the required information using the image below as a template. Click "More Settings...".
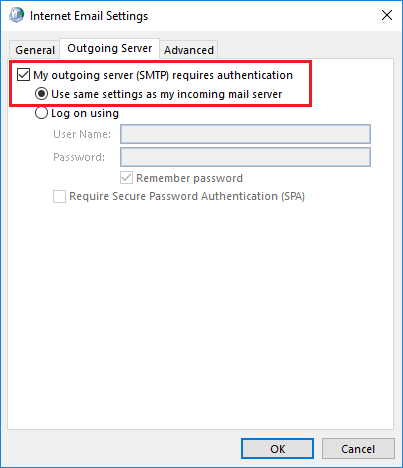
4. Click the "Outgoing Server" tab.
5. Ensure the "My outgoing server (SMTP) requires authentication" checkbox is checked and the "Use the same settings as my incoming mail
server" radio button is filled.
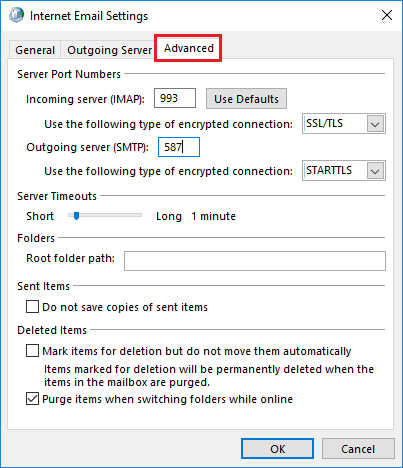
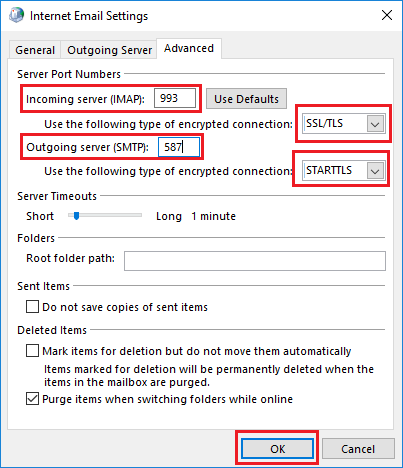
6. Click the "Advanced" tab.
7. Make sure the server settings are set as such and Click OK:
Incoming Server (IMAP): 993
Use the following type of encrypted connection: SSL/TLS
Outgoing Server (SMTP): 587
Use the following type of encrypted connection: STARTTLS
8. Back at the account settings, click "Next".
9. A "Test Account Settings" dialog box will appear and automatically run two tests. Once they are completed, click "Close".
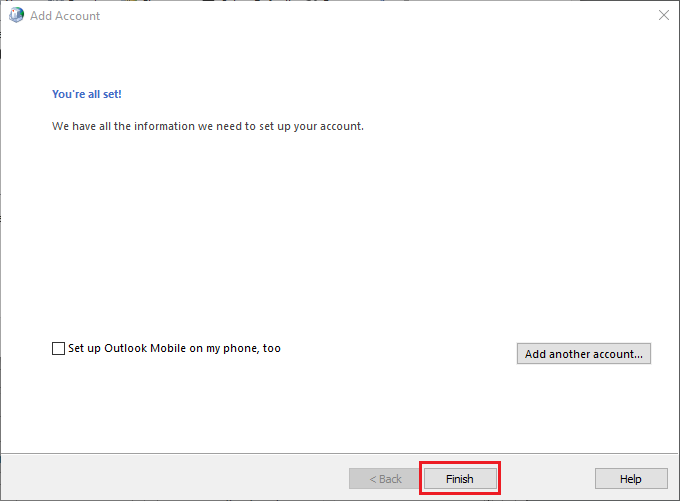
10. The next dialog box will say "You're all set!", click "Finish".
11. The new email account will now be listed, click Close.
12. You can now access your email as normal.
In Mozilla Thunderbird, from the Tools menu select Account Settings.
Select Email account, and then click Next.
Enter your name and e-mail address.
Select IMAP as the type of incoming server you are using.
Your incoming server is mail.nctc.com for IMAP.
Click Next.
Enter your e-mail address for the Incoming User Name, and Outgoing User Name. Click Next.
Enter a name for your email account and click Next.
Verify your account information and click Finish.
In the Account Settings window, select Outgoing Server listed below your new account.
Type mail.nctc.com for the Server Name and change the Port setting to 587
Select User name and password and enter your e-mail address.
Thunderbird will ask you for your password the first time you try to send mail. Click OK.
Your account should now be set up and ready to use. Mozilla Thunderbird is now configured to send and receive email through your mailbox.
Open Outlook 2019. If this is the first time you have opened Outlook, you will be directed to the new account wizard.
When the Welcome to Outlook 2019 box opens, enter your email address and click Advanced options
Check the box for the option Let me set up my account manually and then click Connect.
In the Choose account type window, select IMAP.
Enter the following settings then click Next:
Incoming mail:
Server: Enter mail.nctc.com
Port: 993 for IMAP
Encryption method: SSL/TLS
Require logon using Secure Password Authentication (SPA): Unchecked
Outgoing mail:
Server: mail.nctc.com
Port: 587
Encryption method: STARTTLS
Require logon using Secure Password Authentication (SPA): Unchecked
Click Next
Enter your mailbox password, then click Connect.
Your account should now be set up and ready to use, click OK to close the wizard. Outlook 2019 is now configured to send and receive email through your mailbox.
Windows/Mac
Open Windows Live Mail. On Windows Live Mail toolbar, click File (1), then go to Options (2), and click Email accounts (3).
Now click on Add
Select Email Account, then click Next
Under Logon Information:
In the Email address box, enter your full email address.
In the Password box, enter your email password. If you want Windows Live Mail to remember your password, make sure the check box next to Remember this password is selected.
In the Display name box put your name
Click Manually configure server settings, and then click Next.
Provide the following information on the Configure server settings page.
Under Server Type, select IMAP.
In the Incoming mail server box, enter the IMAP server name:
IMAP: mail.nctc.com Port: 993
Do NOT click Requires a secure connection (SSL) (Remove)
DO select Requires Authentication
Under Authenticate Using, select Clear text
In the Outgoing server information
The Server Address is mail.nctc.com Port 465
Again, as mentioned above, DO select Requires Authentication
In the Logon user name box, enter your Full Email Address: i.e. yourusername@nctc.com
Click Next
On the Your email account was added page, click Finish.
On the Account Settings page, click Close.
Android
Open the Email app and navigate to the Settings section.
Tap Select Others.
Enter your full email address and password.
Select Manual Setup
Select IMAP
Incoming Server: mail.nctc.com
Security Type: TLS (Accept all certificates) and Select Accept
Outgoing Server: mail.nctc.com
Security Type: TLS (Accept all certificates)” and Select Accept
Verify ‘Require authentication to send email’
Email address and password should already be prefilled
Once the settings are entered , tap Next
iOS/iPhone/iPad
iOS Devices: IMAP Configuration
Go into the Settings icon.
Select Mail.
Select Accounts.
Select Add Account.
Select Other.
Select Add Mail Account.
Enter in your Name: (Ex. Jon Doe)
Enter your Email Address and Password: (Ex. user@nctc.com)
Enter a Description (Ex. NCTC Email) and Click Next
Select Save.
Depending on the connection, you may need these additional settings: