
Font Size:
Learn what to watch out for
 Enter your unique Username and Password to sign in to your account. If you did not receive your sign-in information, please contact our office at (615) 666-2151.
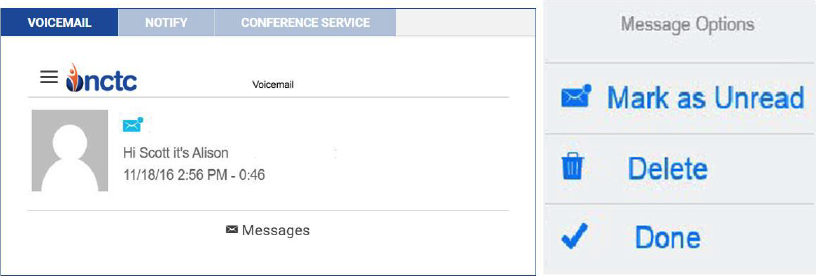
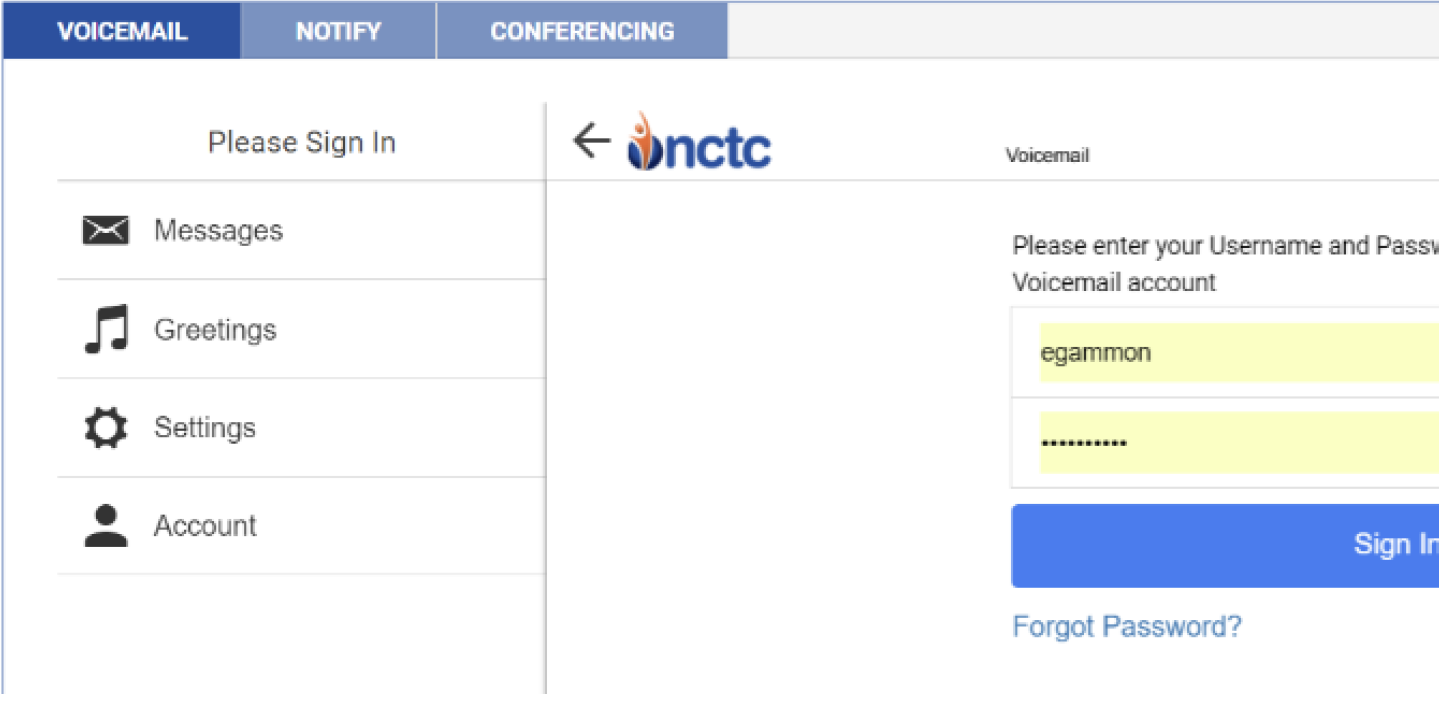 Messages – Displays new and saved messages.
Greetings – Displays greetings callers will hear and allows you to change your Active Greeting.
Settings – Allows you to manage Voicemail messages by setting notification preferences.
Account – Change your password or PIN or log out of your account.
Messages – Displays new and saved messages.
Greetings – Displays greetings callers will hear and allows you to change your Active Greeting.
Settings – Allows you to manage Voicemail messages by setting notification preferences.
Account – Change your password or PIN or log out of your account.
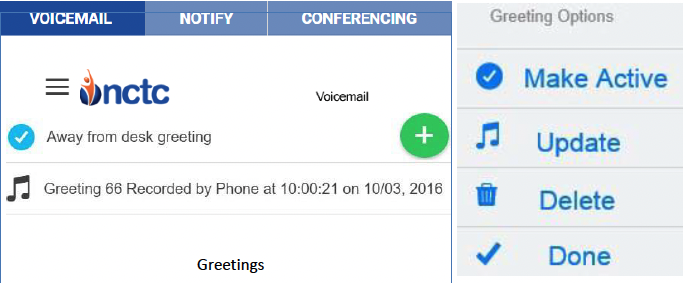
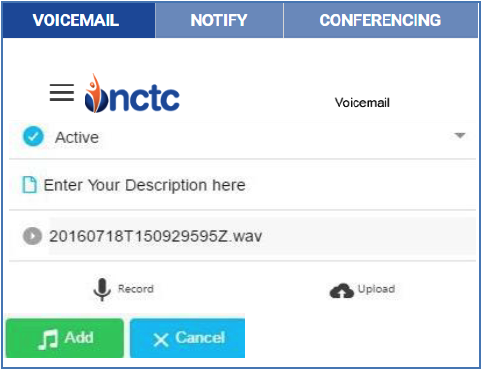 From the Main Menu choose Greetings and click on the Green + button to open the New Greeting box. If you do not want this to be your Active greeting, click the drop down menu and select Default to keep your current greeting Active. Enter a Description for your greeting and click on Record to record your greeting using your computer microphone.
If your Web Browser does not display the Record option, try a different browser.
Choose Upload to retrieve a file from your computer to use as your greeting. Once you have finished recording or adding your new greeting click on the Add button.
From the Main Menu choose Greetings and click on the Green + button to open the New Greeting box. If you do not want this to be your Active greeting, click the drop down menu and select Default to keep your current greeting Active. Enter a Description for your greeting and click on Record to record your greeting using your computer microphone.
If your Web Browser does not display the Record option, try a different browser.
Choose Upload to retrieve a file from your computer to use as your greeting. Once you have finished recording or adding your new greeting click on the Add button.
 From the Main Menu choose Settings then Email Notifications and click on the Green+ to open the Add Email Notification window. Enter your Notification Email address and a description for the Email address. Click on the Add button to add the Email address to your Voice Mail Notification. You can add multiple Email addresses to this feature. To temporarily deactivate an Email or to delete an Email click on the Email to open an Edit Email Notification window. To Disable click the Notification Enabled dropdown and click on Notification Disabled. To Delete an Email address click on the Blue Bell button and choose Delete. Click Update to save your change and then click Done to close the window.
If you want to allow your callers to connect to you at another number, use the Dial 0 option. Enter the number you would like to use. When your caller dials 0, they will be connected to your chosen number.
From the Main Menu choose Settings then Email Notifications and click on the Green+ to open the Add Email Notification window. Enter your Notification Email address and a description for the Email address. Click on the Add button to add the Email address to your Voice Mail Notification. You can add multiple Email addresses to this feature. To temporarily deactivate an Email or to delete an Email click on the Email to open an Edit Email Notification window. To Disable click the Notification Enabled dropdown and click on Notification Disabled. To Delete an Email address click on the Blue Bell button and choose Delete. Click Update to save your change and then click Done to close the window.
If you want to allow your callers to connect to you at another number, use the Dial 0 option. Enter the number you would like to use. When your caller dials 0, they will be connected to your chosen number.


 Enter your unique Username and Password to sign in to your account. If you did not receive your sign-in information, please contact our office at (615) 666-2151.
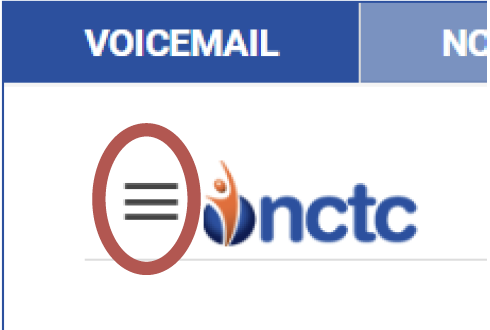
 Click on the Menu Icon circled in Red and select 1 of 4 options that you wish to manage.
There are 4 administrative features to this service:
Click on the Menu Icon circled in Red and select 1 of 4 options that you wish to manage.
There are 4 administrative features to this service:
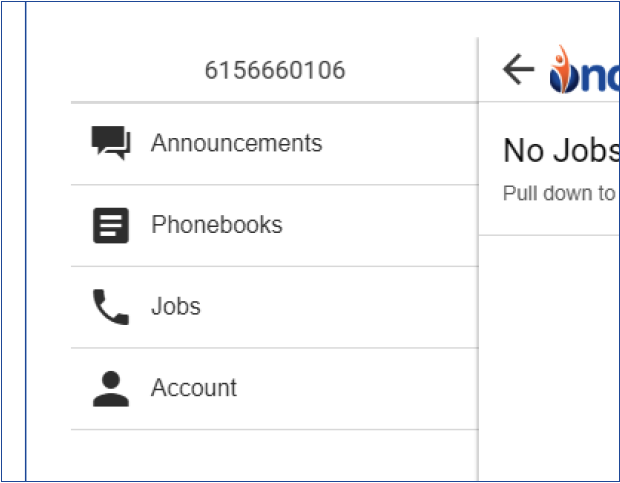 Announcements – Manage audio files that are available to be played for notification calls.
Phonebooks – Organize and store your phone numbers, email addresses and text addresses.
The Jobs – Add, delete, manage and activate your notify jobs.
Account – Change your password or log out of the service
Announcements – Manage audio files that are available to be played for notification calls.
Phonebooks – Organize and store your phone numbers, email addresses and text addresses.
The Jobs – Add, delete, manage and activate your notify jobs.
Account – Change your password or log out of the service
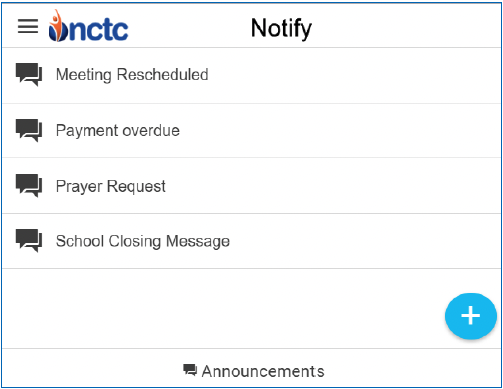
 These are recorded messages that you can send to your Phonebook contacts. From the Main Menu, press Announcements to access your current Announcement library.
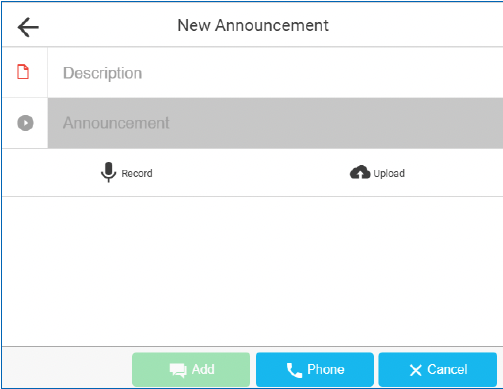
To record a new announcement, press the Blue + button to open the Actions window and select Add Announcement.
Enter a description for your New Announcement in the Description field.
These are recorded messages that you can send to your Phonebook contacts. From the Main Menu, press Announcements to access your current Announcement library.
To record a new announcement, press the Blue + button to open the Actions window and select Add Announcement.
Enter a description for your New Announcement in the Description field.
 You can use your device or computer to Record by pressing the Mic button if displayed. Press Stop when you have finished recording your message. Press the text bubble button to save your recording.
The Cloud button, if displayed, allows you to upload a pre-recorded announcement from your Computer.
You can also call the Notify+ Admin Center to record your announcement at (615) 688-2325.
You can use your device or computer to Record by pressing the Mic button if displayed. Press Stop when you have finished recording your message. Press the text bubble button to save your recording.
The Cloud button, if displayed, allows you to upload a pre-recorded announcement from your Computer.
You can also call the Notify+ Admin Center to record your announcement at (615) 688-2325.
 You can edit your announcements by selecting an announcement from your announcement list which will open the Edit Announcement window.
To listen to the selected announcement press the Play button. To change the Announcement description type in the new description. The Download button allows you to save a copy of your recorded Announcement. To Delete this Announcement press the Red Delete button. Press the Update button to update the Announcement.
You can edit your announcements by selecting an announcement from your announcement list which will open the Edit Announcement window.
To listen to the selected announcement press the Play button. To change the Announcement description type in the new description. The Download button allows you to save a copy of your recorded Announcement. To Delete this Announcement press the Red Delete button. Press the Update button to update the Announcement.
 Phonebooks are used to organize and store your Phone numbers and Email addresses. From the Main Menu, press Phonebooks to access your current Phonebooks.
To create a new Phonebook, press the Blue+ button and select the Add Phonebook option. In the Description field, create a name for your new Phonebook.
Press the Green Add button and choose from the drop-down options to add your Phone or E-Mail Contact. Phone contacts must include their Area Codes.
Upload multiple contacts at one time with the Cloud button. See further down for instructions on uploading multiple contacts from a spreadsheet.
Press the Green Check button to finish adding your contact to the Phonebook. It is important to press the Add button to save your Phonebook when complete.
Phonebooks are used to organize and store your Phone numbers and Email addresses. From the Main Menu, press Phonebooks to access your current Phonebooks.
To create a new Phonebook, press the Blue+ button and select the Add Phonebook option. In the Description field, create a name for your new Phonebook.
Press the Green Add button and choose from the drop-down options to add your Phone or E-Mail Contact. Phone contacts must include their Area Codes.
Upload multiple contacts at one time with the Cloud button. See further down for instructions on uploading multiple contacts from a spreadsheet.
Press the Green Check button to finish adding your contact to the Phonebook. It is important to press the Add button to save your Phonebook when complete.
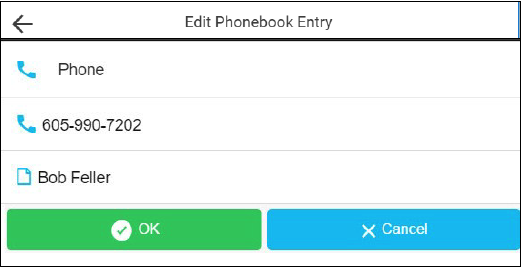 Open a Phonebook and click on a contact to open the Edit Phonebook Entry window.
Clicking on any of the three fields will allow you to change the type of notification (Phone, Email or Text message), the contact phone number, or the name of the contact.
Click OK once the edits have been made.
Click Update to close the entry and save the new changes in the Phonebook.
Open a Phonebook and click on a contact to open the Edit Phonebook Entry window.
Clicking on any of the three fields will allow you to change the type of notification (Phone, Email or Text message), the contact phone number, or the name of the contact.
Click OK once the edits have been made.
Click Update to close the entry and save the new changes in the Phonebook.
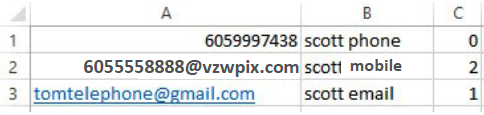 For Verizon text messages use domain name @vzwpix.com, AT&T text messages use @text.att.net, US Cellular use @uscc.textmsg.com, Sprint use @messaging.sprintpcs.com, Bluegrass Cellular use @sms.bluecell.com. Contact us for other carriers.
Important Note: You must save and close the newly created file before Uploading into a Phonebook.
Contact us at (615) 666-2151 for additional assistance with .csv files and converting data inside the columns into the right format.
For Verizon text messages use domain name @vzwpix.com, AT&T text messages use @text.att.net, US Cellular use @uscc.textmsg.com, Sprint use @messaging.sprintpcs.com, Bluegrass Cellular use @sms.bluecell.com. Contact us for other carriers.
Important Note: You must save and close the newly created file before Uploading into a Phonebook.
Contact us at (615) 666-2151 for additional assistance with .csv files and converting data inside the columns into the right format.
 The Jobs section is used to add, delete, and manage notification jobs.
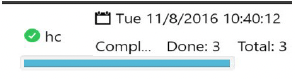
From the Main Menu press the Jobs button, this will display completed and scheduled Jobs. You can select any of the Jobs in your list to review details or to delete the Job.
To schedule a new Job press the Blue + button to open the Actions window and select Add Job.
The Jobs section is used to add, delete, and manage notification jobs.
From the Main Menu press the Jobs button, this will display completed and scheduled Jobs. You can select any of the Jobs in your list to review details or to delete the Job.
To schedule a new Job press the Blue + button to open the Actions window and select Add Job.
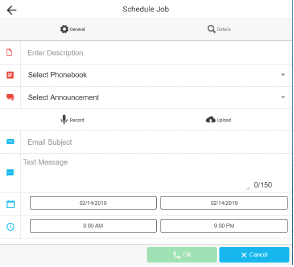 Create a Name for your new Job in the Enter Description field, Select a Phonebook, Select an Announcement, press the Phone button, and your Job will start immediately!
Use Upload to add a new announcement for this Job. Once an Announcement has been selected, a Play button will allow you to listen to the Announcement.
You can enter an Email Subject or text line if you are sending Email or text notifications.
For Email Notifications, enter the message that you would like recipients to receive. Use the Calendar field to set specific Job Start and End dates. You can also use the Time field to select the time range when you would like the Job to run. Press Set to complete your selections.
Press the Phone button to schedule or send out the Notification Job to your selected Phonebook.
The Calendar and Time fields allow for scheduling of future Jobs. By default, Notify+ will only send out Jobs between 8 a.m. and 9 p.m.. Please contact our office if there is a need to change those default times. When you signed up for this service we created certain defaults to meet your needs, refer to page 6 for more information on the Additional Job Features of this service.
Create a Name for your new Job in the Enter Description field, Select a Phonebook, Select an Announcement, press the Phone button, and your Job will start immediately!
Use Upload to add a new announcement for this Job. Once an Announcement has been selected, a Play button will allow you to listen to the Announcement.
You can enter an Email Subject or text line if you are sending Email or text notifications.
For Email Notifications, enter the message that you would like recipients to receive. Use the Calendar field to set specific Job Start and End dates. You can also use the Time field to select the time range when you would like the Job to run. Press Set to complete your selections.
Press the Phone button to schedule or send out the Notification Job to your selected Phonebook.
The Calendar and Time fields allow for scheduling of future Jobs. By default, Notify+ will only send out Jobs between 8 a.m. and 9 p.m.. Please contact our office if there is a need to change those default times. When you signed up for this service we created certain defaults to meet your needs, refer to page 6 for more information on the Additional Job Features of this service.